Friday, April 26, 2024

Something Spooktacular

Now that we're getting ready to head back up north I've been making a push to finish up all my WIPs.

I've slowly been getting my Sewjo back and as Halloween approached I realized I didn't have any of my Ghastlies to put out.  I'd picked up this cute little bundle of Art Gallery fabrics at Portsmouth Fabric Co. and thought it would be perfect to whip up something spooky for the holiday and when I saw Prairie Quilt Co.'s Nocturna block for the Soul-a-long hosted by Mija Handmade it sealed the deal.  

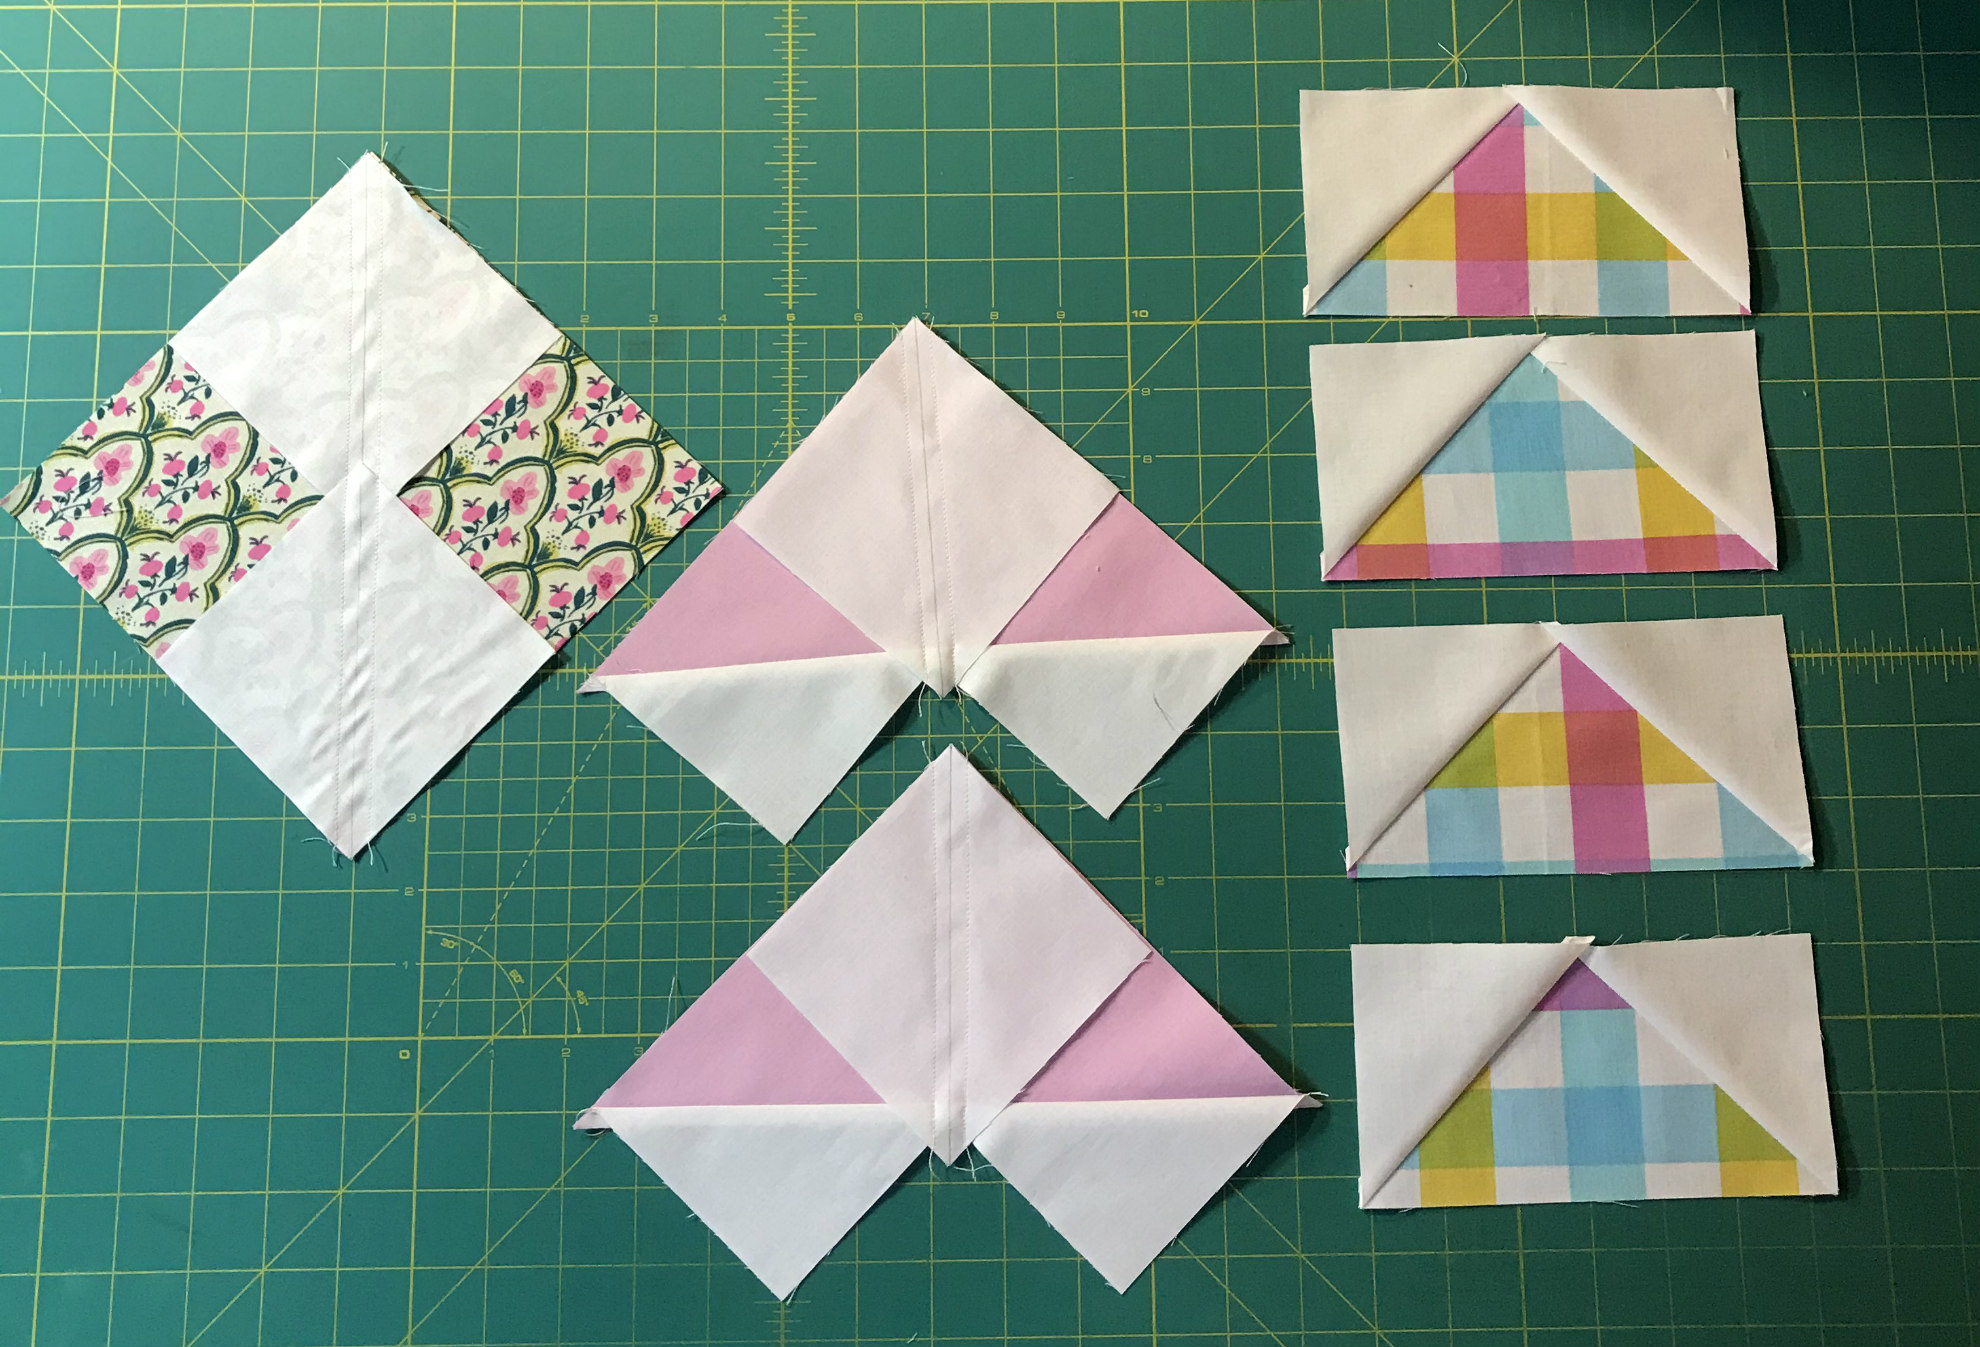
It was an ambitious choice given that I'd barely set up my quilt space and I have almost none of my quilting tools.  If I did it again I'd definitely get a log cabin ruler, this is a bit wonkier than I'd hoped.  The blocks are basically just a courthouse steps block with some pieced logs.  I found it easiest to piece all my logs and then assemble the blocks.

It also was a mental challenge to cut and piece the inverse blocks where I swapped the colors.  Having these block buddies definitely helped me keep my sanity!  Thank you Aimee!!!

I originally planned this as a table runner but after playing with a few different layouts I decided to make it a square.  For the quilting I started by just doing a stitch in the ditch around the bats but then I went a little wild and did these FMQ bats.  Some are definitely better than others and it helps that they're very subtle on the busy background but I love the effect!

I just love to relax and hand tack my bindings.  It's such a nice way to slow down and appreciate all the little details.  I can't wait for Halloween to roll around again so I can put it in action!

Quilt Stats:
Finished quilt is 24" x 24"
Pattern: Nocturna by Prairie Quilt Co. for the for the Soul-a-long hosted by Mija Handmade.
Fabrics: Assorted prints from Spooky n' Witchy and Sweet n' Spookier by Art Gallery Fabrics
Batting: Quilter's Dream Orient Bamboo
Thread: Aurifil 50wt in Blossom Pink (2530) and Pale Pink (2410)

Monday, April 15, 2024

Atomic Starburst

I've wanted to make the Atomic Starburst quilt by the adorable Violet Craft for ages and the MCM vibe of this Christmas in the City collection seemed like the perfect match.  I decided to go off book and size this down to make it a bit more of a throw size and I also added a border to frame it up.  

A lot of people have made this quilt but very few give details.  The best are these videos and blog posts by Canary Quilts.  I especially appreciate her measurements for the background paper piecing pieces and her tip for how to cut piece 4 makes all the difference. If you're new to paper-piecing here is another nice tutorial by I See Stars Quilting.  In general I used the template so that my diamonds didn't have bias edges but for the ones with a directional print I found this triangle ruler worked perfectly.  

Another place where I didn't love the pattern as printed was attaching the sashing.  I started by cutting the strips to size and adding them but quickly decided it would be easier to just sew them on to a continuous strip and then cut them to size.  I did this for both the side and the top sashing.

This is another super useful tutorial by Quilt Addicts Anonymous.  She's using a different pattern but it's a similar diamond quilt tutorial and around the 9 minute mark there's a good explanation for cutting the filler triangles and she also has great tips for matching the points on your sashing.  Matching all those points is a bit tricky but once you get the hang of it they go together nicely.

I was on a roll so I went ahead and basted this one but I doubt I'll have enough time to quilt it before I leave.  Now I have to decide if I take it with me or leave it here waiting for my return.

Wednesday, December 27, 2023

Christmas Caddy

There's nothing like a handmade gift and I definitely wanted to make something special for my BQF.  I spied this cute little Woppet Bucket pattern on Etsy and thought it would be adorable with some of the Christmas in the City fabrics I've been using for my Christmas Star quilt.  

I was on a deadline so I didn't stop to take any pictures of the process.  The pattern is well written and easy to follow and overall I was pleased with the result.  I do like my bags to really stand up on their own so I think if I made it again I'd try a heavier fusible than the Shape Flex 101 suggested or possibly do a quilted outside.  It requires a bit of scrolling (why doesn't IG have better search capabilities?) but Princess In a Pouch has some great tips for using different fillings.


Pattern: Woppet Bucket by Cleverwoppet.  
Fabrics: Prints from Christmas in the City and London Red by Art Gallery Fabrics.  
Thread: Aurifil  50wt Pale Pink (2410)

Wednesday, December 6, 2023

Pining To Sew

I have a slight pineapple obsession and a huge love for Tula Pink so obviously I was going to buy the Pining for You kit that came out with Daydreamer.  I'm not usually one for kits but with all the transitions happening in my life this was the perfect project for grab and go.  I don't have access to my stash right now so having all the fabrics I needed pre-assembled made this feasible though with 50 different fabrics I might have underestimated.  

The blocks are just challenging enough to be interesting but go together quickly and easily.  They are also fairly basic without a lot of points to match.  I did find it best to press the snowball blocks toward the center rectangle and the crown strips towards the triangles.  That way the seams would nest when I sewed them together.  I also found it useful to square up the snowball blocks and the top flying geese crown block.  Doing that made my borders line up best.  There are definitely a few wonky crowns but in the spirit of going with the flow I decided I could live with that.

I did them in sets of 4 as the pattern is laid out.  I could do a set in about 3 hours which is a reasonable block of sewing time to carve out in a day.

It was definitely an adjustment setting up a workspace at our home in Maine.  I was really missing my studio but I made it work and was able to get all of the blocks made before we left for the season.  

Once we got settled again I squared up all my blocks and got to sewing them together.  Buying a 15 1/2" square ruler definitely made the process easier.

And in almost no time I had a finished flimsy.  I decided to make it a little bigger and added a border so it should fit on a king sized bed.  Now to figure out how to get this quilted so I can put it in action.  


Wednesday, October 25, 2023

Preppy Forever

I haven't made a quilt in forever but friends of ours from the sailing club are having a baby and I couldn't resist making something special for them.  I was looking for something quick and easy that I could pull together in my makeshift studio with the limited supply of fabrics I had on hand.  This one was so good the first time I decided to do it again.

I changed it up a bit this time and made the stripes 8 1/2" wide but otherwise it's the same construction as Murray.  The backing is a plaid seersucker I had in my stash and it gives this quilt such a fun texture and makes it a feel a bit more nautical.  It quilted up nicely so I'll definitely be checking my stack of seersuckers when pulling backings.  

He's just so adorable and the 12 wt. Aurifil really makes the quilting pop.

He made quite a splash at the baby shower.  We can't wait to meet our newest little sailor!

Quilt Stats:
Finished quilt is 42" x 56"
Pattern: Based on Preppy the Whale by the fabulous Elizabeth Hartman.
Fabrics: FSDS Winter White and Navy.  
Backing and Binding: Red, white and blue plaid from stash.
Batting: Quilter's Dream Cotton
Thread: Aurifil  50wt and 12wt in White (2024) and Midnight (2745)


Thursday, September 22, 2022

Endless Summer


I totally kept this one under the radar.  I finished it in the spring but really wanted to give it a proper beach photo shoot.  The opportunity finally presented itself when we dropped Dex off at college and stayed for an empty nester-moon in Mystic.  Note to self, photographing quilts on the beach takes way more patience than my family possess.  Between the bright light, ocean breezes and other beach goers it's definitely a challenge but I managed to get a few shots I liked.

I knew I was going to have to make something special the minute I saw Heather Ross' Malibu collection.  After playing with a couple of other ideas I totally copied Stephanie at S-Renee Designs.  She considers herself a fabric collector rather than a quilter but I beg to differ.  Her work is amazing and you should definitely check it out!!!  The original pattern is Joyful but it was Stephanie's idea to upgrade the center square.  I used this fabulous Economy Block Tutorial by Amy Smart at Diary of a Quilter.

While this pattern is very comprehensive and easy to follow after making a test block I was able to streamline the process with some shortcut techniques.  For the flying geese I used this 4 at a time flying geese tutorial by Modernly Morgan (and this one by Suzy Quilts here).  This also has the benefit of correctly orienting the directional prints.  

I also streamlined making the corner HST units using this 8 at a time technique by Suzy Quilts.  

This was another one I entrusted to my amazing friend Rebecca and asked her to do a traditional Baptist fan design to mimic ocean waves.  As always she totally delivered and it is exactly how I envisioned it.  

Also, that plaid backing!!!  


Quilt Stats:
Finished quilt is 70"x70"
Pattern: Joyful by Tasha Noel
Fabrics: Malibu by Heather Ross, Ruby + Bee Solids, MMCC Soft White
Batting: Quilters Dream Bamboo
Binding:  Ruby + Bee Solids Aquamarine
Quilting: Baptist Fan pantograph by Rebecca Loren


Friday, June 24, 2022

Wedded Bliss

I love a modern take on a traditional quilt design!  Tara Faughnan's innovative approach for making the oldie goldie Double Wedding Ring goes together easily using freezer paper piecing and she has tons of great tips for handling the curved piecing as well.  I started this in a Zoom workshop with her and it was honestly one of the best classes I've ever taken.

As usual this lingered in the TBQ pile for a while but over the winter I pulled it out and quilted it in fits and starts while binging on Inventing Anna and The Woman in the House Across the Street from the Girl in the Window.  I used Jacquie Gering's masking tape hack to straight-line quilt the centers.  If you haven't checked out her book Walk: Master Machine Quilting with your Walking Foot, do it.  She has so many great suggestions for great results with less effort.  

I'd outline stitched all the arcs but it still felt a bit sparsely quilted so I taught myself a new skill and did these ribbon candy swirls in the arcs.

With several college visit road trips looming I pushed myself to get this finished up so I'd have something to occupy myself in the car.  Accepted students days at 5 schools in 5 weeks was intense.  (Go Camels!)

I'm a sucker for a perfectly mitered striped binding corner shot!

I had just enough of this fabulous Beauty Queen print for the backing.  One of my all-time faves!

We spent Father's Day at a friend's house so I took advantage of her beautiful landscaping and tall son to change things up for my photo shoot.  I love this spot and want to use it for all my quilts.


Quilt Stats:
Finished quilt is 72"x 72"
Pattern: Double Wedding Ring by Tara Faughnan
Fabrics: Bella Solids Bleached White, RJR Supreme Solids Shell Pink, Michael Miller Cotton Couture: Berry, Indigo, Khaki, Essex Metallic: Oyster, Peony.
Backing Letty from the Beauty Queen collection by Jennifer Paganelli for Free Spirit.
Batting: Quilters Dream Cotton
Binding: Dear Stella Stripe
Thread: Aurifil Natural White (2021) and Pale Pink (2410)