Wednesday, March 30, 2016

I Love Lucy!

One of my favorite babies turned 1 this week and of course that calls for a handmade gift.  ABCs might be a bit advanced for her age but with a librarian for a mom I know she'll be reading in no time!

I was so excited when I found an Eva charm pack while I was cleaning out my scrap bin, the perfect collection for Lucy's Mod Girl nursery.  I took Sugar Bee Crafts' advice and used the acid green for the backs of all the letters to make it clearer which way they should go.

There are a ton of tutorial's out there for making these.  I used these plush alphabet templates from Chez Beeper Bebe but I took the lazy girl's approach which is to say I printed the letters on Avery full page sticker paper (not reversed) that I could just stick to my fabric.  No tracing and they're reusable:-)  Just remember to cut out and sew around the inside bits.  Note: the W in this template is too big for a 5" charm square.

Once I stitched around the letters I cut them out with pinking shears.  I used two layers of batting, a great way to use up all those leftover bits.

Repeat 26 times in one day and your hand will be extremely sore.

Make a coordinating Lined Drawstring Bag to hold them all and you have a perfect gift.  What's you're go to baby gift?

Friday, March 25, 2016

Sew Together

I'm not going to lie, I spent more time socializing than sewing at this year's BostonMQG retreat.  It really is just more fun to sew together;-)

In the end I was able to check off all of my highest priority items...  the things that are really more fun to do with friends.  I quilted Let It Go, basted Spellbound, got started piecing my Briar Rose bundle, and thanks to the awesome Aimee got my maxis hemmed.  Best of all I finished up my Sew Together Bag.

I pulled these fabrics to coordinate with my Sewing Circle Tote.  I did an exhaustive search for tips, most of which boil down to follow the Quilt Barn Sew-A-Long.  Just be cautious before you check out the Flickr group or you'll never be able to choose your fabrics:-)  Seriously, I think that was the hardest part of this project.

This bag does have 4 zippers so if you're phobic after this you'll either be cured or traumatized for life.  I did use Amanda Jean's modifications for the zipper ends.  If I did it again I would finish my zippers to 9" rather than 8 3/4".  I felt there was a little extra room but this adds a polished finish to the bag and is an excuse to sneak one more fabric into the mix.

I was hoping to have this finished in time to take to retreat but only made it thru Step 4.  Lucky for me, this pic was last week's Hawthorne Threads WIP It winner.  Thanks Charlie & Lindsay!!!

For some reason I could not grasp how to assemble the final zipper tabs but with a several experienced Sew Together sewists on hand I was finally able to figure it out and even won at bobbin chicken:-)

I can't wait to go away again so I can put it to good use:-)


Sewing along with this week's Finish it Up Friday by Crazy Mom Quilts and another finish for Q1 of  the 2016 Finish Along.

Friday, March 18, 2016

Lining Up

alidiza: Lining Up - Lined Drawstring Bags
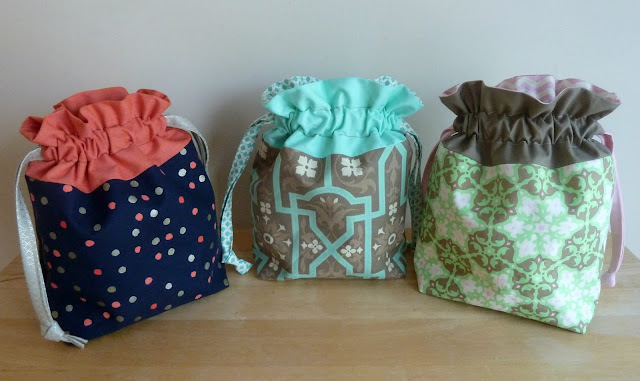
Back when I was trying to find my Sewjo I got the idea to make some little retreat gifts for my BQFs.  The awesome Aimee is always making me adorable things (totally love her!!!) and I'm the bad friend who never reciprocates (though I do always pick up the check).  I got hooked on making these cute little Lined Drawstring Bags to go with my ABCs and decided my friends deserved some too.  The LDB is prefect for any occasion and a great stash buster...  I had so much fun picking out color combinations to suit each of my friend's personal style.

alidiza: Lining Up - Amy Butler Lined Drawstring Bag
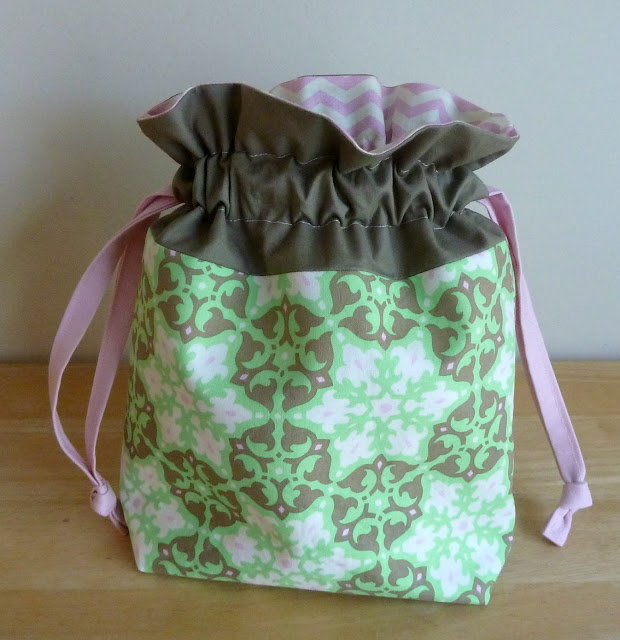
Only for Aimee would I dig into the "my precious" bin for some Amy Butler Daisy Chain and Heather Bailey Chevrons.

alidiza: Lining Up - Cotton + Steel Lined Drawstring Bag
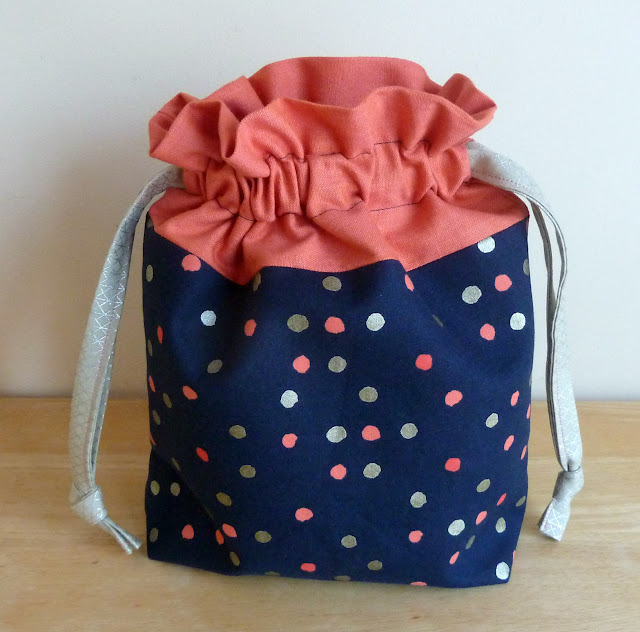
For Alexis, Ms all solids all the time, I kept it classy with these fabulous metallics by Cotton + Steel.  I decided to make the contrast band and interior from one piece of coral linen leftover from my Sewing Circle Tote.  You'd think this would make things easier but somehow messed me up.

alidiza: Lining Up - Deer Valley Lined Drawstring Bag
And for Rebecca I went with her quilt crush Joel Dewberry Deer Valley mixed with Seafoam and some Lily Ashbury Summer House.  I am totally crushing on this color combo from my Mod Log Cabin quilt!

alidiza: Lining Up - Michael Miller Littles Lined Drawstring Bag
Just when I thought I was finished Audrey spied these and requested one for her grips...  who could say no when a picky teen actually asks you to make her something?  She put together this adorable nautical combo of Michael Miller Littles.  Preppy runs in the family;-)

This is a great pattern, clearly written and easy to follow but I do have one tip if you're like me and too lazy to mark your lines for the casing...  For the first line I line the top of my bag up against the edge of my needle plate which gives me a seam allowance of 1 1/4".  For the second line I nestle a small 1" ruler along the line I just stitched and move my needle all the way to the right.  I just gently hold the ruler in place as I stitch around the top.  Also, for all of these I added a layer of Shape Flex (SF101) to the exterior fabric to give them a little more body.  It depends what you're going to use them for but I like a bag that will stand up on it's own.

Tomorrow is Worldwide Quilting Day...  I'm on retreat with the Boston MQG and we're sewing up a storm.  How will you be celebrating?

Checking in with this week's Finish it Up Friday by Crazy Mom Quilts.

Wednesday, March 16, 2016

W.i.P. Wednesday: Here We Go...

It seems counterintuitive but I've been sewing like a maniac to get ready for our 6th annual Boston MQG retreat.  I've been busy making gifts for my BQFs (Shhh, don't tell!) and I wanted to make a Sew Together Bag to match my Sewing Circle Tote.  I almost succeeded...  finishing this will be my first order of business.

I like to quilt things on retreat.  It's a safe(er) post-cocktail hour activity and it goes faster with friends.  This week I whipped up this watercolor quilt with leftover blocks from Keeping It Together Again.  It's basted and ready for some FMQ swirls and I've got my Tula Pink Houndstooth ready to go.

I've also got a few ideas for piecing new things planned...

I spotted a bolt of this Going Coastal plaid at Fabric Place Basement at our last guild meeting and snapped it up to back a project with this bundle.

And it's probably a good time to break into this Briar Rose bundle...  a little fix to tide me over until my Mendocino pre-order arrives;-)

Somehow it's become a tradition for me to hem my latest maxi acquisitions on retreat so I threw in what I expect will be this summer's uniform...  if I'm lucky the absolutely awesome Aimee will serge them for me again.

I never actually finish everything I bring with me on retreat but I'd hate to run out of things to do:-)  What's your quilt retreat strategy?

Friday, March 11, 2016

Urban Window

alidiza: Urban Window Flea Market Fancy quilt
What a difference a week makes!!!  I got a much better day for a quilt shoot for this one.  This flimsy has been languishing in my TBQ pile since 2012 when I realized it was too small to back the Urban Windows quilt I made as a shop sample for Quilter's Way.  It's been a regular on my finish along lists but still never happened.

alidiza: Urban Window
When I booked a block of appointments at Laurena's Longarm this was at the top of my list.

alidiza: Urban Window
And with the help of a couple extra "busy" days of chauffeuring I had the binding on in no time.   If I did it again I'd make the binding in red.  I don't feel like the grey does a good job of framing the design.

alidiza: Urban Window Flea Market Fancy quilt
I did another easy pantograph on this one and then went back and outlined the windows at home on my domestic machine.  It's subtle but gives it a hint of movement.

alidiza: Urban Window Flea Market Fancy quilt
I love the simplicity of this one and how it highlights one of my favorite fabrics.  It's a lovely addition to my collection and will get plenty of use:-)

Checking in with this week's Finish it Up Friday by Crazy Mom Quilts and a finish for Q1 of  the 2016 Finish Along.

Quilt Stats:
Finished quilt is 66" x 73"
Fabrics: Flea Market Fancy by Denyse Schmidt, Kona Snow, and FSDS Red.
Pattern:  Urban Windows by the amazing Jenny Pedigo at Sew Kind of Wonderful.
Pantograph: Zydeco by Sarah Ann Myers.
Batting: Quilter's Dream Orient Bamboo.
Thread: King Tut Sunflowers (#955).

Wednesday, March 9, 2016

Scrap Happy

I'm not usually a use up every last bit of fabric kind of girl but lately I've been downright scrappy!  It all started with these improv QAG scrap baskets...

As I was sorting my scraps I stumbled upon these leftover bits from my Tula Pink Houndstooth quilt.  I wanted to make a sample to test thread colors on and I got the idea to piece together these triangles to make a block I could use.  I liked it so much I went to work on the rest of them.

And then I realized my good friend's baby is about to have her first birthday.  Also in the scrap bin I unearthed the remainder of my Eva scraps from my Easy As 1, 2, 3 quilt...  perfect for some ABCs with the added bonus of using up all those batting scraps I've been saving.

And of course a birthday gift with 26 pieces practically requires a coordinated bag to store it in which got me hooked on making Lined Drawstring bags...

I'm not sure it's actually making a dent in my scrap bin but it sure is fun:-)  What's your favorite scrap busting project?

Scraptastic Tuesday

Friday, March 4, 2016

Keeping It Together Again

alidiza: Keping It Together Again
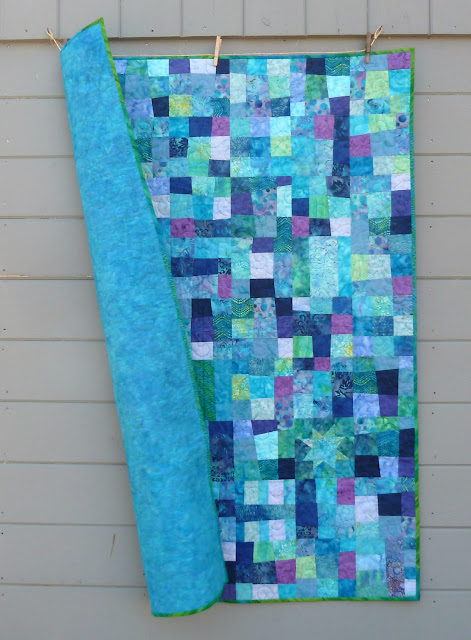
I've been keeping this one under wraps until I could get it gifted but now I can finally share.  I originally planned this as a larger version of my Keeping It Together quilt, a mix of 9 patch blocks interspersed with wonky 9 patches.  I'm not good at repeating myself and eventually I got bored with the original design so I started adding other blocks.  My favorite is the wonky star/starfish.

I quilted this at Laurena's longarm.  This simple wavy pantograph was the perfect way to ease back into using the longarm.
alidiza: Keping It Together Again
It's been awhile since I made bias binding.  I love this funky fold technique!!!  I pieced in a couple of strips of the school of fish fabric, it feels like they're swimming out of the quilt.

alidiza: Keping It Together Again
This would have been better with a beachy photo shoot but in the interest of getting it gifted I had to go with a frigidly cold day.  Here I managed to catch a well timed guest of wind to show off the back.

Checking in with this week's Finish it Up Friday by Crazy Mom Quilts and a finish for Q1 of  the 2016 Finish Along.

Quilt Stats:
Finished quilt is 49" x 62"
Fabrics: Assorted batiks from stash.
Pantograph: Happy Times by Hermione Agee.
Batting: Quilter's Dream Orient Bamboo.
Thread: King Tut De Nile (#927).

Thursday, March 3, 2016

Throwback Thursday: Eva Easy As 1, 2, 3

It's Throwback Thursday over at A Quarter Inch from the Edge.  I'd been trying to decide what to share while sorting out my scrap bin and came across the remains of an Eva charm and immediately knew what to share...

I made Easy as 1, 2, 3 back in 2010 before I started blogging using a pattern I designed myself.  It's based on the magic number theory and each unit contains 1 - 6 1/2" square, 2 - 3 1/2" squares and 3 - 2 1/2" squares.  It's a perfect way to use a layer cake!

I was definitely starting to be influenced by the modern quilting movement and went with a pieced back.  I love this little glimpse of each fabric.  This is also one of the first quilts I quilted on the longarm at Laurena's Longarm.  Today I'd probably just FMQ this on my domestic machine but back then I wouldn't have dared:-)

I wish I had more photos to share but I gifted to my husband's Aunt and Uncle for their 30th wedding anniversary.  It's such a treat to see it on their couch whenever we visit.


I love this collection by Basic Grey for it's pinks & greens so I used the scraps to make a mini stacked coins for myself.  I've got a plan for those scraps I found so expect to see something new from this collection soon;-)


Take a trip back to the past and check out what everyone else is sharing at this month's Throwback Thursday.

Wednesday, March 2, 2016

W.i.P. Wednesday: WWAD?

I'm definitely more of a piecer than a quilter so it's an ongoing struggle to tame my TBQ pile.  While my FMQ skills on my domestic are definitely improving there are quilts that either because of the design or their size are better quilted on the longarm.  I went thru my pile and set up a series of appointments at Laurena's Longarm, my local rental spot.  It's been awhile so I started with some simple pantographs to get back into the swing of things and knock things off the list but now I'm ready to do some more custom FMQ designs.

I didn't want to jump right into it on my precious quilts so I decided to make a simple practice piece.  Of course it was already Thursday and I was scheduled to quilt on Tuesday so it had to be something I could whip up fast and I wanted lots of negative space so I'd have room to work on my FMQ.  The Boston MQG has a solids challenge coming up so I thought this would be a good chance to play with color schemes.  I made a quick trip over to Quilter's Way and picked up a stack of Michael Miller Cotton Couture solids that coordinate with this old fave Kaffe Fassett Serape Faded.

I started with a 2"ish strip of each and improv pieced together a bunch of log cabin blocks in varying sizes and framed them with white and moved them around my design wall until I had a layout I liked.  I was waffling on the color for the background until I started thinking about what to do for the back.

I wanted this quilt to be big enough to be worth quilting on the longarm but wasn't thrilled to be buying another 3+ yards of fabric for a back.  I started shopping my shelves specifically looking for fabrics I had lots of when I spotted this awesome Joel Dewberry Deer Valley print I picked up at Marden's.  As soon as I saw that the entire plan came together...  Seafoam!

Whenever I'm faced with how to quilt something I ask myself "What Would Angela Do?"  To make the most of my quilting time I made a print out of the finished top and sat down with my go to, Free-Motion Quilting with Angela Walters, to make a plan.  This was a HUGE help and saved me from wasting my quilting time trying to think of what to do next though I did make a few changes on the fly based on what wasn't working for me and the realities of working on a longarm.

I tried to choose a good mix of patterns: ones I was already comfortable with and some that were new.  Some that would be simple and a few that would definitely challenge me.  I also tried to make each section large enough to actually get some practice yet not so big that I'd get bored with any one design.

And 5 hours later it was done...  Here it is fresh of the longarm:-)  There are a few mess ups and places I deliberately decided to leave empty but plan to go back and fill in on my domestic machine but I'm pleased with the results and can't wait to get the binding on it.  I learned so much from this exercise from the practical, "think about where you want to end before you start" to my personal preferences, "circles suck and ruler work is really hard".  Angela just put out a fabulous post of Three Things Machine Quilters Shouldn't Do so I tried to keep these in mind every time I look at those not quite round circles;-)

What's your favorite FMQ design?